


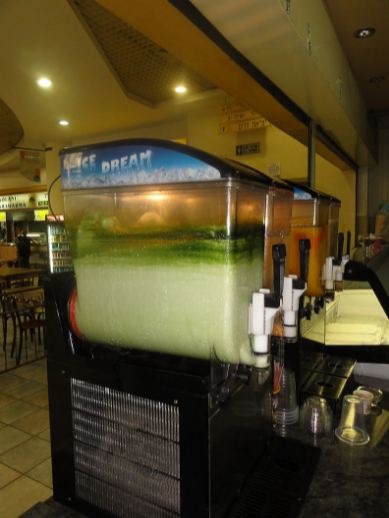
Have you ever considered how frequently the best slush machine should be cleaned? Have you ever considered how to clean your storage unit thoroughly? Maybe you have, perhaps you care about hygiene and have devoured your operation manual like a summer best-seller.
Possibly you’ve seen some of the horrors that can befall your frozen beverage machine, so let’s move on to something more upbeat! Let’s clean that slush machine!
Here are some tips for cleaning a slush machine quickly.
Clean and Hygienic
Your Slush machine, like any other high-quality investment, requires regular maintenance. To keep your machine clean and looking its best for your customers, scrubbing it down with a light detergent and warm water and buffing it with a dry cloth should be done frequently. The tap and tray should be given additional attention, especially if your machine is self-service and handled by several hands!
Once a month, a thorough cleaning is recommended. Clean your tank with a light detergent and lukewarm water, then rinse. A damp cloth is perfect for wiping the lids. This downtime can be used to inspect and maintain your machine.


Cleaning Requirement
- Condenser clean – Weekly
- Wash and rinse – Weekly
- Lubrication – Twice Weekly
Your slush machine should be cleaned, sanitized, and the seals lubricated at least once a week, or every 500 drinks, whichever comes first.
It’s also crucial to utilize high-quality slush syrup. Sugar is an essential component of high-quality slush syrup because it works as an antifreeze in the freezing barrel. If you are tempted to buy so-called “cheap” slush syrup, you risk damaging your slush machine by putting undue strain on the motor gearbox due to the decreased sugar level.

CLEANING INSTRUCTIONS
- Turn off the cooling by pressing the snowflake button. Then, empty the hoppers. Remove the lids and unplug the hopper light cords (if you have an autofill model, disconnect the fill hose and level probe from the hopper).
- Lift the hopper slightly by pressing the hopper lock button (shown).
- To remove the hopper, pull it forward.
- Carefully remove the auger straight out of the cooling drum.
- Remove the seal from the cooling drum’s back.
- There is spring tension on the faucet. To properly disconnect the handle from the hopper, spread one side of the handle first, then the other.
- Carefully lift the faucet valve to remove the spring and seal. Be cautious not to break the seal. The seal should not be bent since it will damage the sealing surface.
- Remove the auger nose bushing from the hopper’s inside.
- Avoid scratching the seal since scratches can cause leakage around the seal.
- Thoroughly clean all parts with a sanitizing solution and moderate hot water (120°). For smaller components and locations, use a clean bristle brush. The hopper lids should not be submerged. Sanitizer should have a concentration of at least 3% accessible chlorine and 100 ppm (parts per million) of available chlorine.
- Use a clean washcloth dampened in hot water and sanitizing solution to wipe the drums, hopper drip trays, and lids. Pay special attention to the shaft area.
- Before reassembling the dispenser, clean all surfaces with a clean wash towel and dry with a clean, dry washcloth.
Re-assembling Slush Machine
- Replace the seals on the back of the cooling drums’ flanges. Make sure the seals are firmly in place.
- Reposition the auger on the cooling drum. It’s possible that you’ll have to rotate the auger to align the auger shaft’s flat face with the auger nose’s flat face.
- Replace the auger nose bushing in the hopper’s inside front.
- Reinstall the hoppers over the augers and cooling drums after thoroughly rinsing them.
- Press down on the hoppers until the hopper lock plungers click into place. Connect the fill hoses and level probes if you have an autofill model at this time.
- Replace the hopper lids and connect the hopper lid lamp cords.
- In the faucet valve, reposition the faucet seal and return spring.
- Return the faucet valve assembly to its original position on the hopper.
- To compress the spring, pull down on the valve. Then, one at a time, carefully slide the faucet handle over the faucet valve and snap it into place on the hopper.
- Reattach the drip tray.
Now, the best slush machine is ready to use!
Remember:
A few areas on the slush machine are easy to overlook during the cleaning process, resulting in a less-than-ideal taste and purity for your product. Small and easy-to-miss places such as the inside edge of the hopper base, the inside of the faucet valve, the faucet valve lid, and the bottom of the faucet valve where it connects with the hopper can discreetly collect undesired filth, funk, and mold.
As you clean your slushy machine, keep this in mind.